Difference between revisions of "MailSetup/Outlook2000"
From FreecycleFAQ
| [checked revision] | [checked revision] |
(Replaced content with 'These directions are written to use Outlook 2000. They have been written to allow you to add your freecycle.org mail account to your email program once your mail account has ...') |
|||
| Line 1: | Line 1: | ||
| − | These directions are | + | These directions are for use with Outlook 2000. They have been written to allow you to add your freecycle.org mail account to your email program once your mail account has been created/moved to the "mail.freecycle.org" server. |
| − | + | | |
| + | |||
| + | *Start up Outlook 2000 and click the "Tools" entry on the menu bar. From the menu that drops down, select "Accounts". | ||
| + | |||
| + | [[Image:Outlook2000_step1.jpg]]<br> | ||
| + | |||
| + | |||
| + | |||
| + | |||
| + | |||
| + | |||
| + | |||
| + | *In the dialogue box that appears, click the button marked "Add" and select "Mail..." from the mini-menu that appears. | ||
| + | |||
| + | [[Image:Outlook2000_step2.jpg]] | ||
| + | |||
| + | |||
| + | |||
| + | |||
| + | |||
| + | |||
| + | |||
| + | |||
| + | |||
| + | *The "Internet Connection Wizard" will now appear. Whatever you enter under "Display name" will appear on emails you send alongside your email address in the "From" field. | ||
| + | |||
| + | [[Image:Outlook2000_step3.jpg]] | ||
| + | |||
| + | |||
| + | |||
| + | |||
| + | |||
| + | |||
| + | |||
| + | *In the E-mail address" box, type your Freecycle email address (it will be in the format of '''youremailaddress@freecycle.org'''). | ||
| + | |||
| + | [[Image:Outlook2000_step4.jpg]] | ||
| + | |||
| + | |||
| + | |||
| + | |||
| + | |||
| + | |||
| + | |||
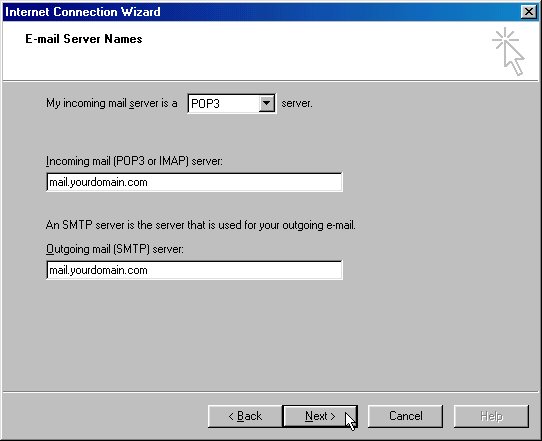
| + | *Where it says "My incoming mail server is a", click the small arrow to drop down a list and choose '''IMAP'''. In the "Incoming mail server" field, enter '''mail.freecycle.org''' and enter the same under "Outgoing mail server". Then click Next | ||
| + | |||
| + | [[Image:Outlook2000_step5.jpg]] | ||
| + | |||
| + | |||
| + | |||
| + | |||
| + | |||
| + | |||
| + | |||
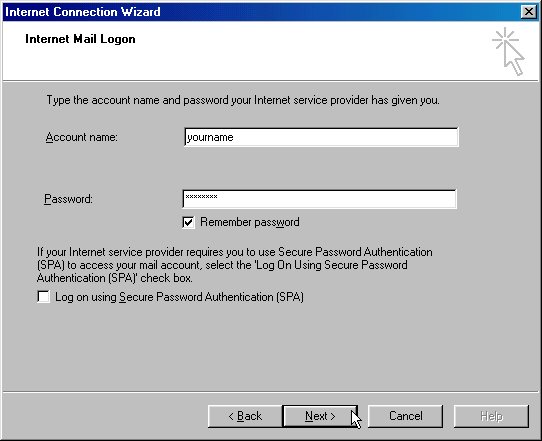
| + | *Under "account name" type your email address (again in the format '''youremailaddress@freecycle.org''') and add your password to the "Password" box. | ||
| + | |||
| + | [[Image:Outlook2000_step6.jpg]] | ||
| + | |||
| − | |||
| − | |||
| − | + | ||
| + | |||
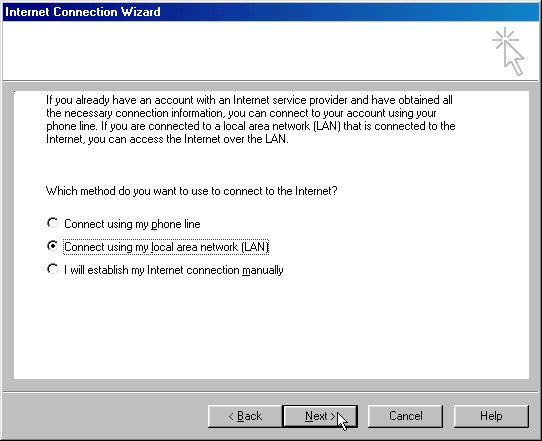
| + | *If you need to, choose your method of connecting to the internet and click Next | ||
| + | |||
| + | |||
| + | |||
| + | |||
| + | |||
| + | [[Image:Outlook2000_step7.jpg]] | ||
| + | |||
| + | |||
| + | |||
| + | |||
| + | |||
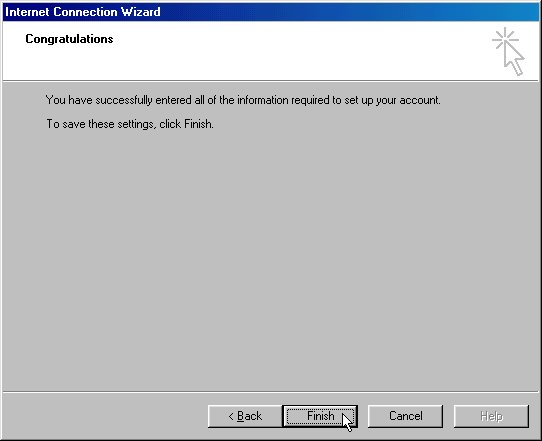
| + | *Now click "Finish" - although we're not finished yet. | ||
| + | |||
| + | |||
| + | |||
| + | [[Image:Outlook2000_step8.jpg]] | ||
Revision as of 12:36, 14 July 2011
These directions are for use with Outlook 2000. They have been written to allow you to add your freecycle.org mail account to your email program once your mail account has been created/moved to the "mail.freecycle.org" server.
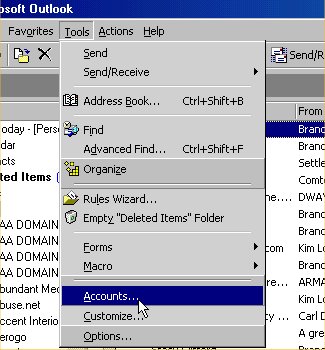
- Start up Outlook 2000 and click the "Tools" entry on the menu bar. From the menu that drops down, select "Accounts".
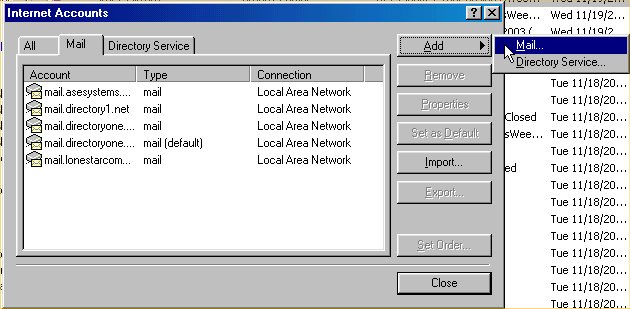
- In the dialogue box that appears, click the button marked "Add" and select "Mail..." from the mini-menu that appears.
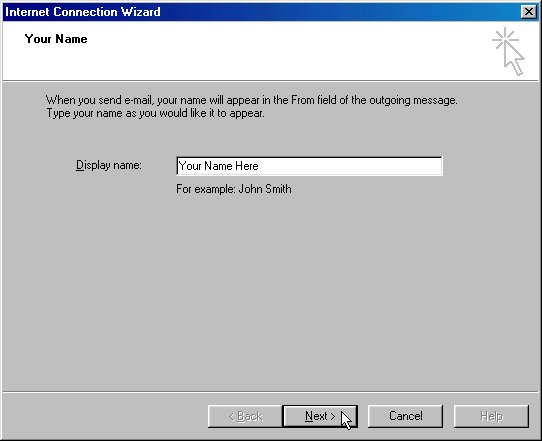
- The "Internet Connection Wizard" will now appear. Whatever you enter under "Display name" will appear on emails you send alongside your email address in the "From" field.
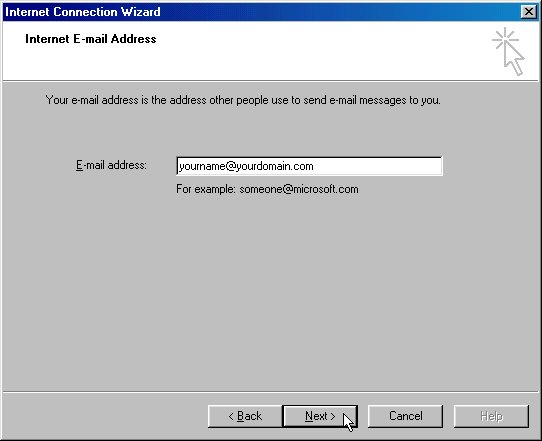
- In the E-mail address" box, type your Freecycle email address (it will be in the format of youremailaddress@freecycle.org).
- Where it says "My incoming mail server is a", click the small arrow to drop down a list and choose IMAP. In the "Incoming mail server" field, enter mail.freecycle.org and enter the same under "Outgoing mail server". Then click Next
- Under "account name" type your email address (again in the format youremailaddress@freecycle.org) and add your password to the "Password" box.
- If you need to, choose your method of connecting to the internet and click Next
- Now click "Finish" - although we're not finished yet.
